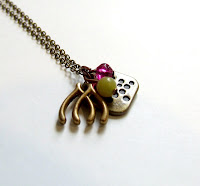
A few weeks ago a girl from my church was wearing some super cute earrings. I told her that I liked them... her mom told me that she loves wearing glamorous earrings... but not the price tag. I told them I could teach her how to make them herself for free. Next think you knew, I had two 11-year old gals (the first brought a friend) and her mom at my kitchen table ready to learn! Making dangle earrings really is quite easy (and after this whole teaching lesson I am going to make a tutorial and start selling DIY earrings kits for kids - not sure why I didn't think of that before!), and these kids (and adult) got it with little instruction! Here is what they created in less than 2 hours!:


Needless to say, I was quite proud :)
Next on the list was several sets of bridal jewelry. Someone contacted me on Etsy awhile back and asked if I could make several sets of my pearl ball necklaces with matching earrings, though change up the color a bit to include white pearl ball rather than a salmon one. Consider it done!

After I sent Laura her earrings and necklaces (I threw in a set for the bride, too!), she wrote:
"I just got them- they are beautiful!!!!!! I love how everything turned out- thank you so much!! Thank you for including an extra for myself :) I put it on immediately haha (figure it has to go away till the wedding, but couldn't help myself)- they are so beautiful!!! Thank you so much for working with me on this- was a pleasure!! :) would def recommend to anyone who asks. Thanks again!!!!!!"
 I also got a last-minute phone call from a few friends at church stating the need for a mother-of-the-bride necklace for a wedding a few days away! The gals brought the dress that the MOtB planned to wear and we collaborated to make a necklace/earring set of pearls and crystals - my favorite! Best of all, I spotted the MOtB at church the next weekend wearing the pearl and crystal earrings with white jeans and a blue shirt - it was an unexpected match made in heaven! I have since duplicated and posted the earrings on Etsy - thanks for the inspiration, ladies!
Last but most certainly NOT least, one of my most favorite customers turned dear friend (whom we met via this blog, actually!) commissioned me to make a necklace with a rather unique source of inspiration - the colors and art she plans to use for her baby's nursery! Nilsa plans to wear the necklace at her maternity photo shoot in a few weeks, and asked that we focus on turquoise, lime, and orange based on these pieces of art she is loving from Etsy (check out Nilsa's blog for the link to each piece!):


Focusing on the vibrant orange, turquoise, and lime color scheme Nilsa requested, I started by sending her a picture of some beads I had on hand that might work:

From there we agreed on these beads:

Now for the actual layout. I had some lofty ideas for this project, but after a few failed attempts, I knew I could easily do something like this as seen on Michael's.com:

Nilsa and I agreed on making the necklace 3-strands and measuring right above the bust... so I went to work and sent her these pictures along the way to make sure we were on the same page:


After getting her OK, I finished the wire strands off and put it all together on the toggle clasp!


This project was a great way to use some of the more upscale beads I have been collecting but too afraid to use up :) The turquoise, jade, and crystal beads make for one mighty fine statement necklace, if you ask me, and it's not made of plastic! Can't wait to see your maternity shots, Nilsa! Congrats on your pregnancy and thanks for allowing me to be a part of the celebration!
Oh, and I almost forgot. Bead Up has some VERY exciting news! Not only am I now an official business in the State of Missouri (it only took me 2 hours total to get it done - amen for the Midwest!), but I have set a date for the Second Annual Cupcakes, Cocktails, and Creations party! I have been working with local artists and bakers to get some other vendors in on the party, which will be held in my house (again, hooray for Midwest suburban super sizes!). Buckle up, Kansas City, and start saving your spare change!


So save the date for August 28th from 2-5! I couldn't be more excited!